Solving CloudFlare and Let’s Encrypt Issues on a new Ghost Blog
I wanted to consolidate two websites into a single, new Ghost platform. Re-using one of the existing URLs, and having the site behind the CloudFlare CDN caused issues with the install and LetsEncrypt SSL setup. Here’s what I did to get everything working.
I wanted to consolidate two websites into a single, new Ghost blog platform. Re-using one of the existing URLs, and having the site behind the CloudFlare CDN caused issues with the install and LetsEncrypt SSL setup. Here’s how I got everything working.
The starting point
One site was hosted on GitHub pages behind CloudFlare to provide a custom DNS name and SSL. The other was a WordPress site.
I debated mightily between Medium, WordPress, SquareSpace, Wordpress, and Ghost. Then should it be hosted vs running it myself. I decided I wanted to control everything, so chose Ghost, and hosting it myself. There’s plenty or articles on all of that, but here are two I found helpful in the basic setup of a cheap DigitalOcean droplet.
How to deploy a Ghost blogging platform to Digital Ocean
Step by Step: Setting up Ghost with a Digital Ocean Droplet
Setup
Since I was re-using a URL, and I didn’t want to take that offline until everything was ready, I setup Ghost with the IP address as the URL. That meant HTTP only, because Ghost doesn’t setup even a self-signed SSL certificate that way.

Ghost over http
Hint: Make your site private while doing the initial setup. Go to General Settings, scroll to the bottom and enable “Make this site private”. It will give you a password, so only you can see any content.

Ghost: Make this site private
If you want additional security, enable a DigitalOcean (or other) firewall and restrict SSH and HTTP to your IP address only.

DigitalOcean droplet firewall example
Migrating data
The first website used Jekyll on Github Pages. There’s a converter and migration guide at GitHub - mekomlusa/Jekyll-to-Ghost. That worked, but the second step of converting at How to Migrate to Ghost from other platforms - Docs (to convert to MobileDoc) totally failed for me. As I didn’t have many articles, so it was easier to recreate them. Ghost’s markdown conversion is awesome. I essentially pasted the article, then uploaded and fixed the image links.
The second website was Wordpress. Even easier to copy and paste. Though the Wordpress plugin is there to make that easier.
Redirecting URLs
To keep Google and other search results from being lost, I followed Google’s Site Move Guide.
The article URL format changed from /year/month/article-name/ to just /article-name/. I created a redirects JSON file with all articles by going to Settings, Labs, downloading the current redirect file, editing and re-uploading. The guide is in Ghost Tutorials, but it was simply filling out one line for each article, like below.
[
  {"from":"/2014/10/pocket-internet-privacy-shield/","to":"/pocket-internet-privacy-shield/","permanent":true},
  {"from":"/2016/12/privacy-from-corporations/","to":"/privacy-from-corporate-data-gathering/","permanent":true}
]
I made a list of all the old urls, did a search/replace for the Ghost IP urls, and tested each one.
Then I tinkered with themes, tags and other bits until I was ready to switch over.
Moving DNS and setting up SSL through CloudFlare
Now it got tricky. I needed to:
- Change CloudFlare DNS to point to the new Ghost IP address.
- Change the Ghost URL, and enable SSL.
- Purge the CloudFlare cache
Change CloudFlare DNS
Changing CloudFlare DNS was straightforward. Delete the old records. Create new ones. To make the site use the domain name (without www) by default, I created an A record for the domain, and a CNAME for www. Like:
A @ 1.1.1.1 Automatic TTL
CloudFlare DNS setup
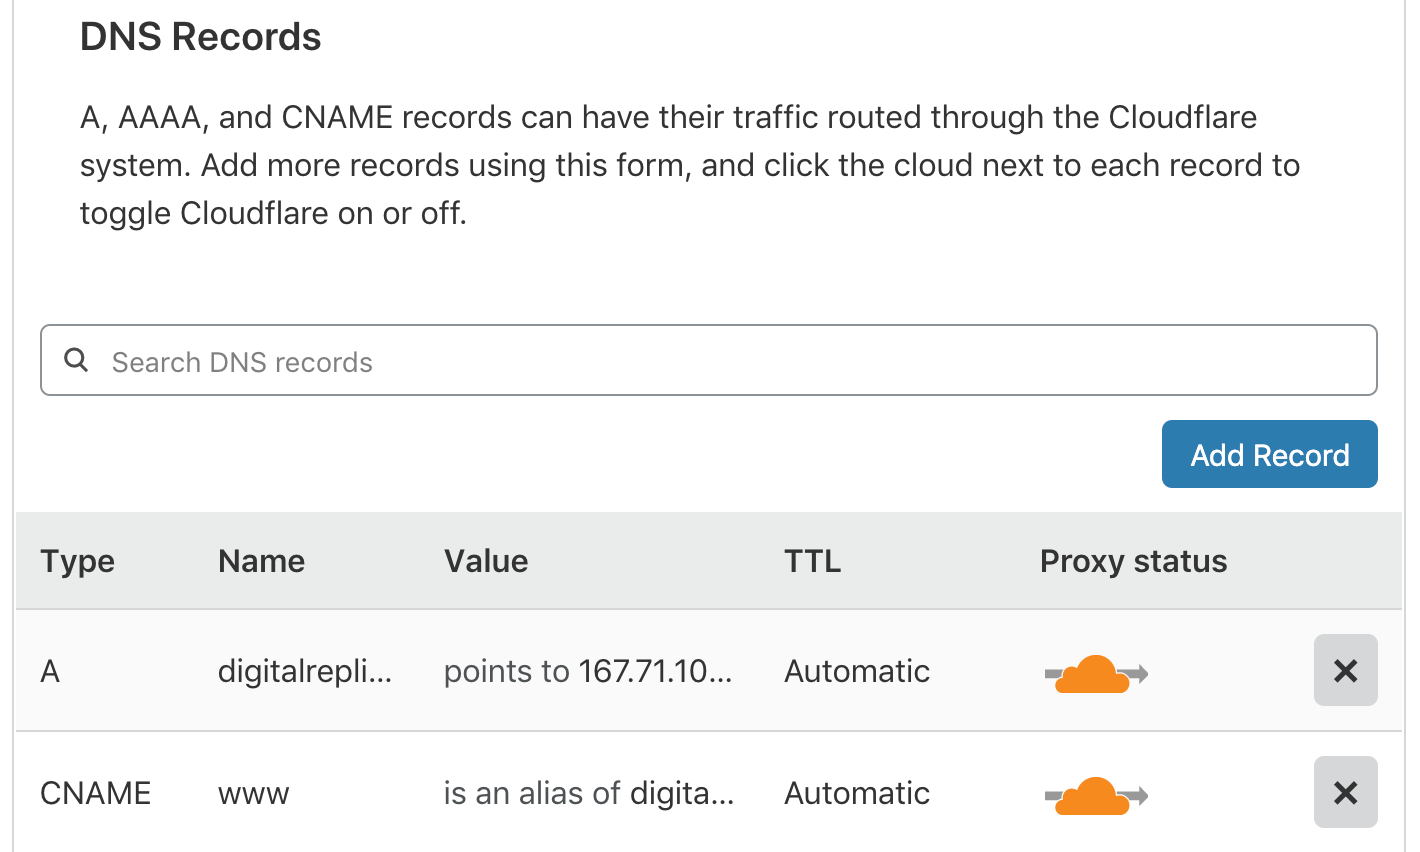
CloudFlare DNS setup screenshot
Note the proxy status. I had it enabled, which caused problems and a few extra steps. For anyone else trying this, I would do the next steps with proxy status disabled for the A record (so the icon is gray), then re-enable it once SSL is set up.
Change Ghost URL and enable SSL
Ghost uses LetsEncrypt to setup SSL. LetsEncrypt validates that your server is actually on the DNS domain name before it issues a certificate. Since CloudFlare is in the middle of this, I followed their LetsEncrypt support page to enable the webroot option. Log into the Ghost system using SSH, then run
nano /etc/letsencrypt/cli.ini
At the bottom of the file, add the line
authenticator = webroot
Next I went through the steps to change the Ghost site URL via How do I change my configured site URL? It failed, with the error message from LetsEncrypt of:
✖ Setting up SSL
One or more errors occurred.

1) ProcessError
I tried rerunning “ghost setup nginx ssl”, which did nothing. I tried running the LetsEncrypt command manually, which seemed to complete, but the site still had no SSL.
The fix
First, I disabled the CloudFlare proxy status for the A record (from orange to gray). Then on the Ghost server, I ran the commands below:
[email protected]:/var/www/ghost $ sudo -i -u ghost-mgr
[email protected]:/var/www/ghost $ cd /var/www/ghost
[email protected]:/var/www/ghost $ ghost setup ssl
? Enter your email (For SSL Certificate)
...
✔ Creating ssl config file
...
✔ Setting up SSL
I verified with the netstat command and saw that nginx was finally listening on port 443.
[email protected]:/var/www/ghost $ netstat -n --listening
Active Internet connections (only servers)
Proto Recv-Q Send-Q Local Address       Foreign Address     State
tcp        0      0 0.0.0.0:80          0.0.0.0:*         LISTEN
tcp        0      0 0.0.0.0:443         0.0.0.0:*         LISTEN
Opening a web browser, my site loaded using HTTPS. Hurray!
Purging CloudFlare cache and re-enabling proxy status
CloudFlare still had the old site cached, so I went to the Caching tab and clicked the “Purge Everything” button. Then I went back to the DNS tab, and re-enabled the proxy status (turning it orange again). Refreshed the browser.
It works!
Note: Changing anything in CloudFlare DNS takes about 5 minutes to propagate. You have to wait for the DNS time-to-live to expire before trying. Check often using the dig command (Mac OS or Linux). The timeout is the second column, in seconds. Or just wait 5 minutes before trying.
$ dig digitalreplica.org A

;; ANSWER SECTION:
digitalreplica.org.	300	IN	A	104.18.40.96
digitalreplica.org.	300	IN	A	104.18.41.96
Verifying CloudFlare status in the browser
You can verify in the browser whether you’re hitting the site directly, or going through CloudFlare. This varies by browser, but in Firefox, click the lock icon in the URL bar, click the arrow for details. If it says “Verified by: CODOMO CA Limited”, you’re going through CloudFlare. If it says “Verified by: Let’s Encrypt”, you’re hitting the server directly without going through CloudFlare.
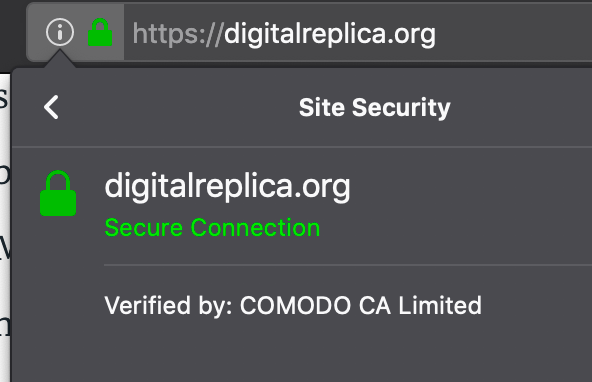
Verifying SSL Certificate in Firefox
That’s it. Everything is working after that. I was super happy.
Summary
So far, Ghost appears to be a great blogging platform. Hope this helps others in creating theirs.