Pocket Internet Privacy Shield

When I travel, the thought of using the Internet in hotels and such leaves me feeling gross and paranoid that someone can see what I’m doing. As a penetration tester who hacks people this way, and seeing how awful some hotel Internet setups are, I feel pretty justified in my paranoia.
So I wanted to make a hardware-based device that was cheap, easy to use and effective at protecting my privacy in not-quite-trustworthy networks. Here’s what I made with step-by-step instructions on making your own.
Goals
- Allow my computers and devices to use untrusted network in a safe way. (Or at least safer than the alternatives)
- Block all incoming connections (a hardware firewall)
- Encrypt all traffic so people on the untrusted network can’t intercept it. This includes DNS traffic, which is sometimes tricky to deal with
- Be able to handle stupid hotel captive portals
- Based on cheap hardware
- Be easy to use
You can do this sort of thing directly on your laptop and some devices. But if you have several, it gets to be a pain to deal with.
The Solution
Hardware
I purchased a TP-Link “Mini Pocket Router”. It’s roughly 3 inches square and an inch thick, so small enough to fit it a bag. It’s also very easy to re-purpose for other things like this. It has:
- Two wired network jacks for an internal and external network
- A wireless chip that can do simultaneous access point mode (so your devices can connect to it) and client mode (so it can connect to the crappy hotel wireless)
Cost: currently $26 at Amazon.
The exact model is a TP-Link TL-WR710N mini pocket router.
Software
The device can do some of the things out of the box. But I don’t trust the software to be that secure, and want it to do more anyway. So instead, we’re using OpenWrt. It is a popular Linux distribution for embedded devices and used as the basis for many home routers.
Cost: free
VPN
A useful tool for online privacy is a paid VPN (virtual private network) service geared towards privacy. The better ones support open standards, can’t tie traffic from a given IP address back to a specific user, don’t keep logs of your traffic and make some statement of how they will deal with law enforcement requests. A good link to start with is:
http://torrentfreak.com/which-vpn-services-take-your-anonymity-seriously-2014-edition-140315/
I picked one with a good rep, and that supported OpenVPN, a popular open-source VPN software package.
Cost: typically $50-$100 per year
How to Survive this Install
Beer or wine certainly helps. The only scary part is replacing the software with OpenWrt. Once that’s done, if you mess up, it’s easy to reset the device and start over. There are some tricky bits to edit configuration files and copy them to the device, but otherwise everything else is done using a web browser
Assumptions
This can be done several different ways. But this install tries to do the easiest thing that anyone can follow. So I’m assuming:
- You’ve purchased a TP-Link TL-WR710N and found a VPN provider that supports OpenVPN
- Your computer is (or can be) using a wired network connection and it’s working correctly
- Your computer gets its IP address through DHCP, which is default on most systems
- You have a working Internet connection and web browser
- You have (or can install) a couple of programs that can do SSH and SCP (more on that in a sec)
- You have a paperclip or something similar. This is quite important.
For Windows systems, there’s nothing by default that supports SCP (for transferring files) or SSH (for logging in at a command line). The best and easiest are below. You will definitely need WinSCP, but only need PuTTY to troubleshoot if things don’t work correctly the first time.
PuTTY: http://www.chiark.greenend.org.uk/~sgtatham/putty/
WinSCP: http://winscp.net/eng/index.php
Linux and Mac have tools like this built in. So if you have those, I’m assuming you can follow along or Google equivalents.
Conventions
During the install, look for this type of formatting in text.
Italics: Something you look for on the screen or device
Bold: Something you type, click or select
Now to Actually Install Something
##3 Download OpenWrt
Download OpenWrt BarrierBreaker 14.07 from downloads.openwrt.org. You may also want to look for a newer version. If so, the device is an ar71xx-generic-tl-wr710n and you want the file with squashfs.factory.bin in it.
Connect to the TP-Link Device
Connect network cables to the TP-Link device and plug it in
- Take the network cable from your computer and plug it into the LAN/WAN port
- Plug another network cable from your computer to the LAN port
- Plug in the device
- The light will blink a couple of times and turn solid green
At this point, the device (and your network) are completely unsecure. Now is not the time to go out for a few hours or go to bed. So connect to the management webpage at the link http://tplinklogin.net .
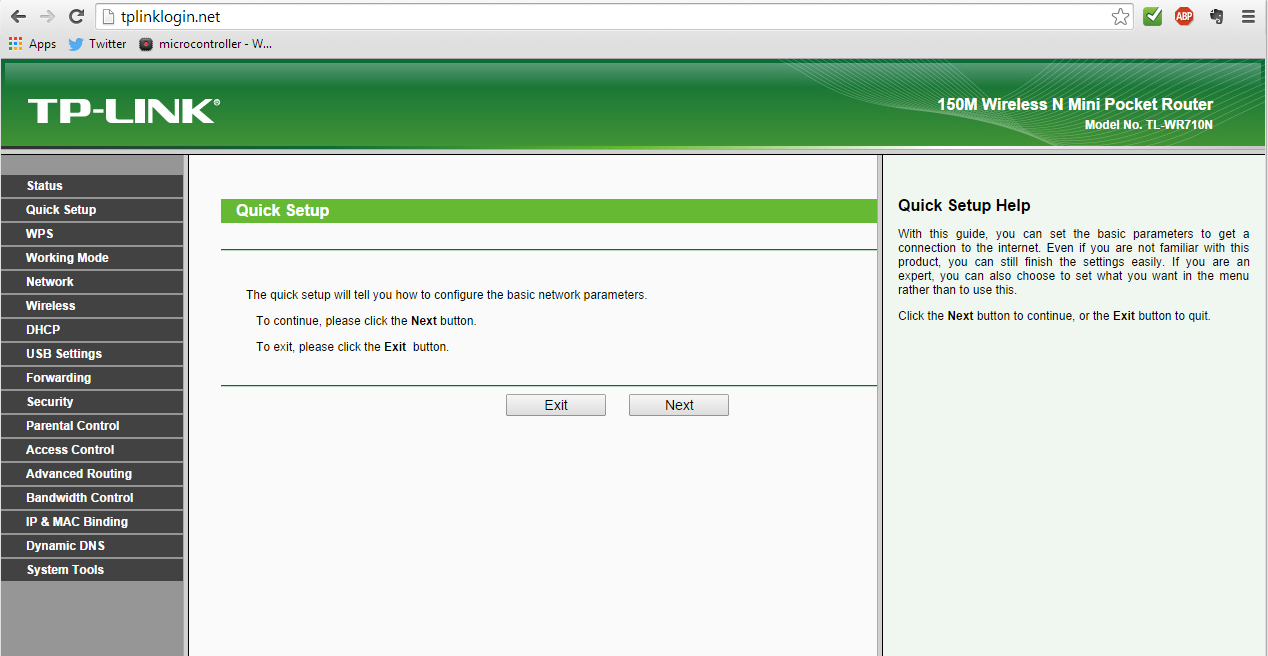
Login with a username and password of admin. It will ask you to start the Quick Setup process. You don’t care, because it’s about to get blown away. Click the Exit button.
Install OpenWrt
- In the management webpage, open the System Tools menu from the left sidebar
- Select Firmware Upgrade from the menu
- Click the Choose File button
- Select the openwrt-ar71xx-generic-tl-wr710n-v1-squashfs-factory.bin file downloaded earlier
- Click the Upgrade button
- The page will say “Are you sure to upgrade the firmware?” Click OK
- The file uploads in a couple of seconds
- The Processing screen shows a progress bar
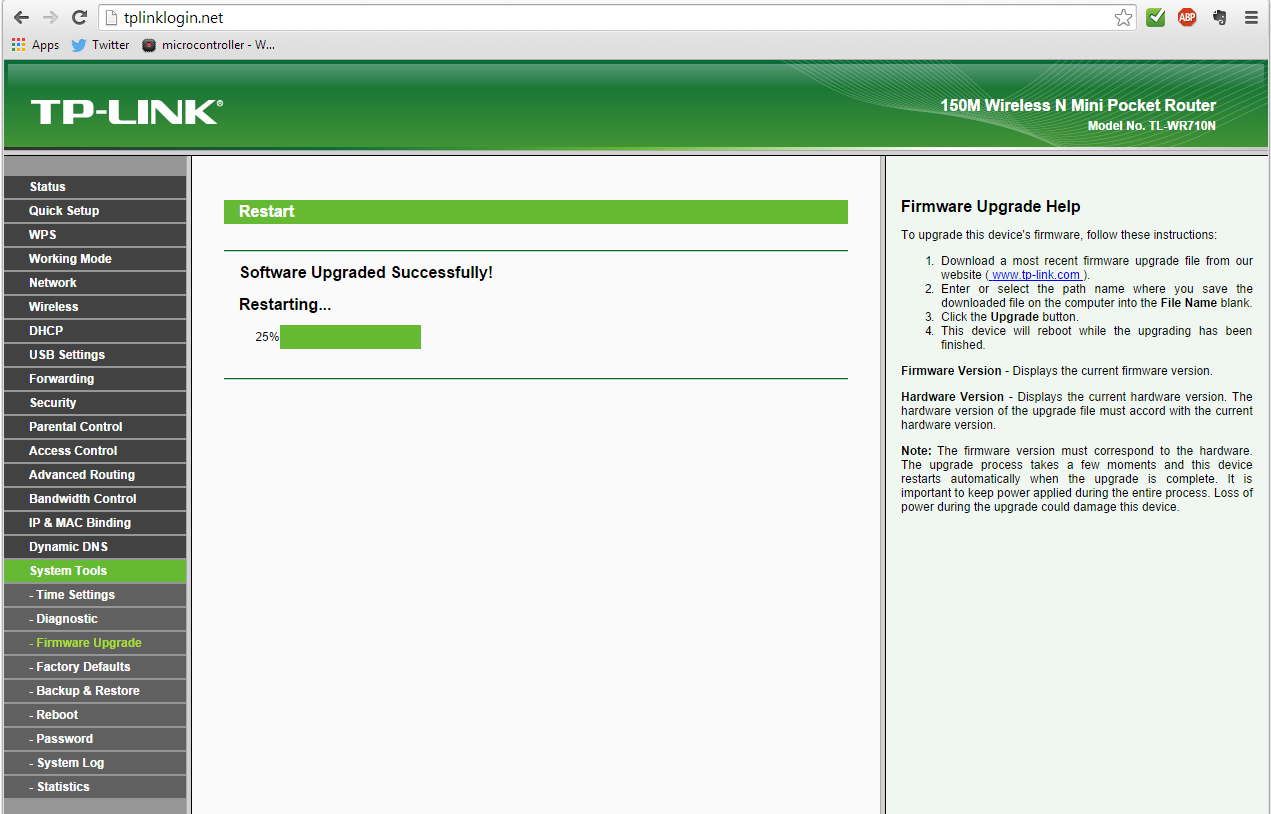
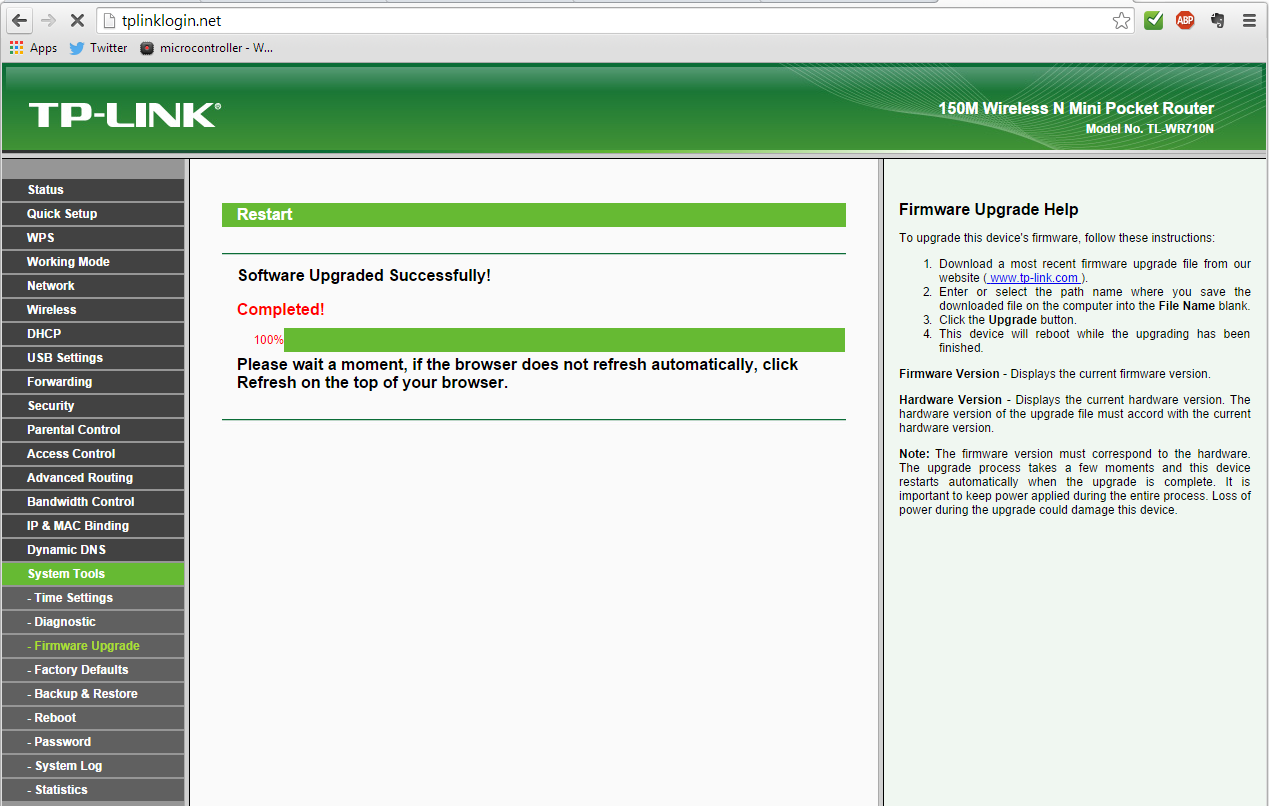
- The Software Upgraded Successfully! Restarting screen shows a progress bar
- When that screen shows Completed! in red, the upgrade is complete

Logging into the TP-Link Device

Choose firmware upgrade file
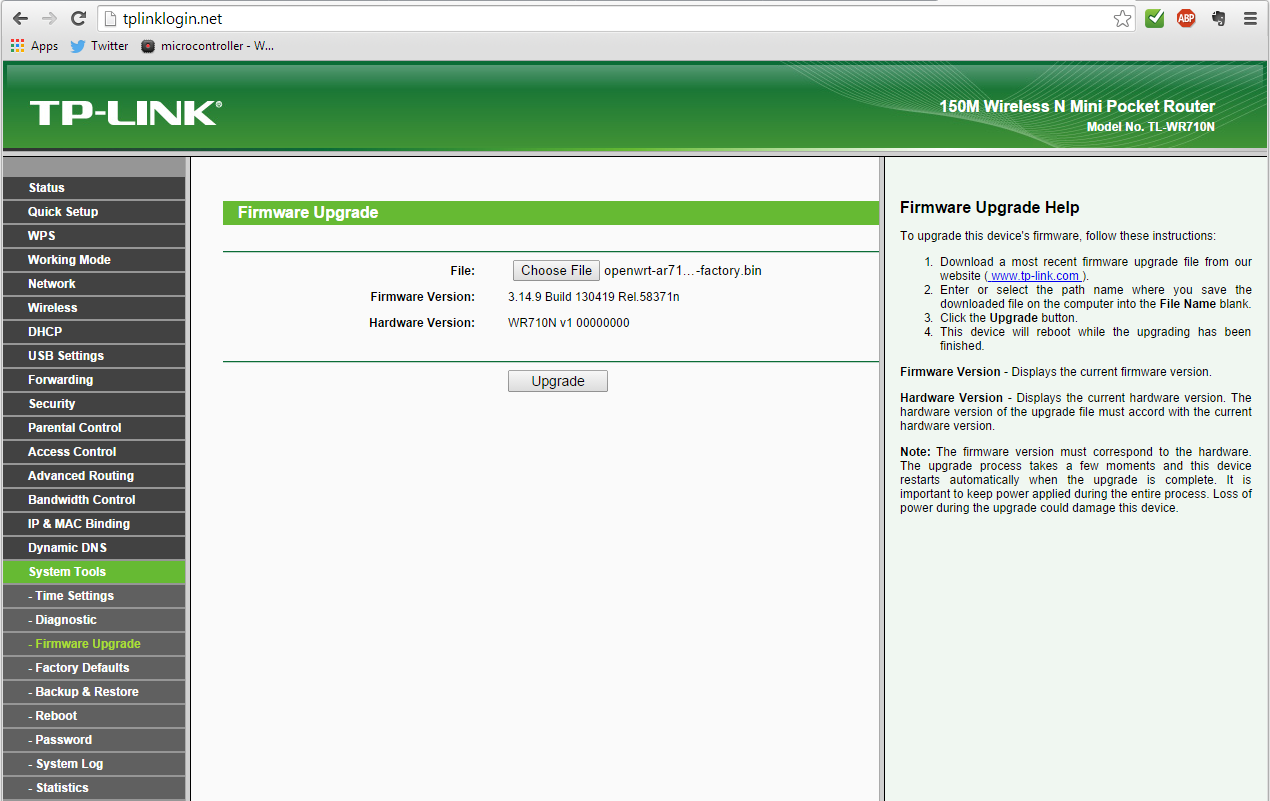
Firmware upgrade file chosen
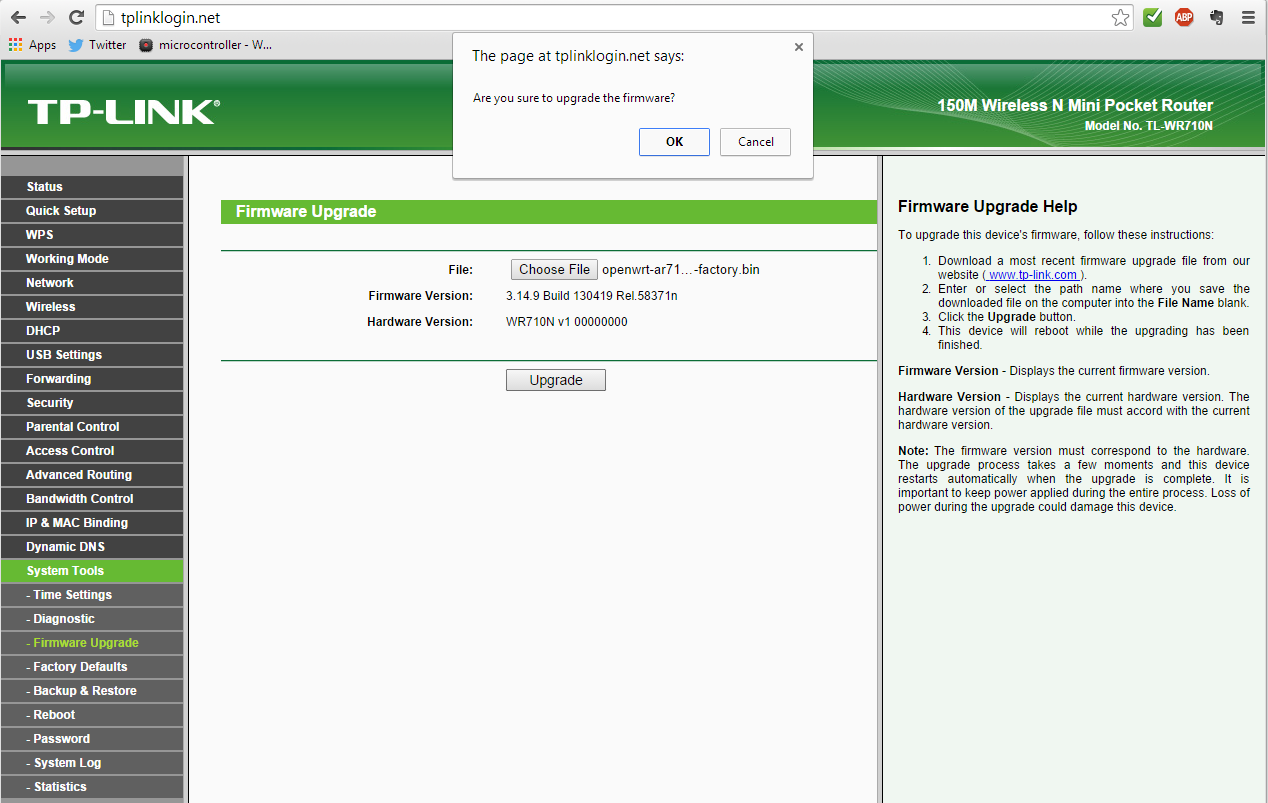
Are you sure to upgrade the firmware
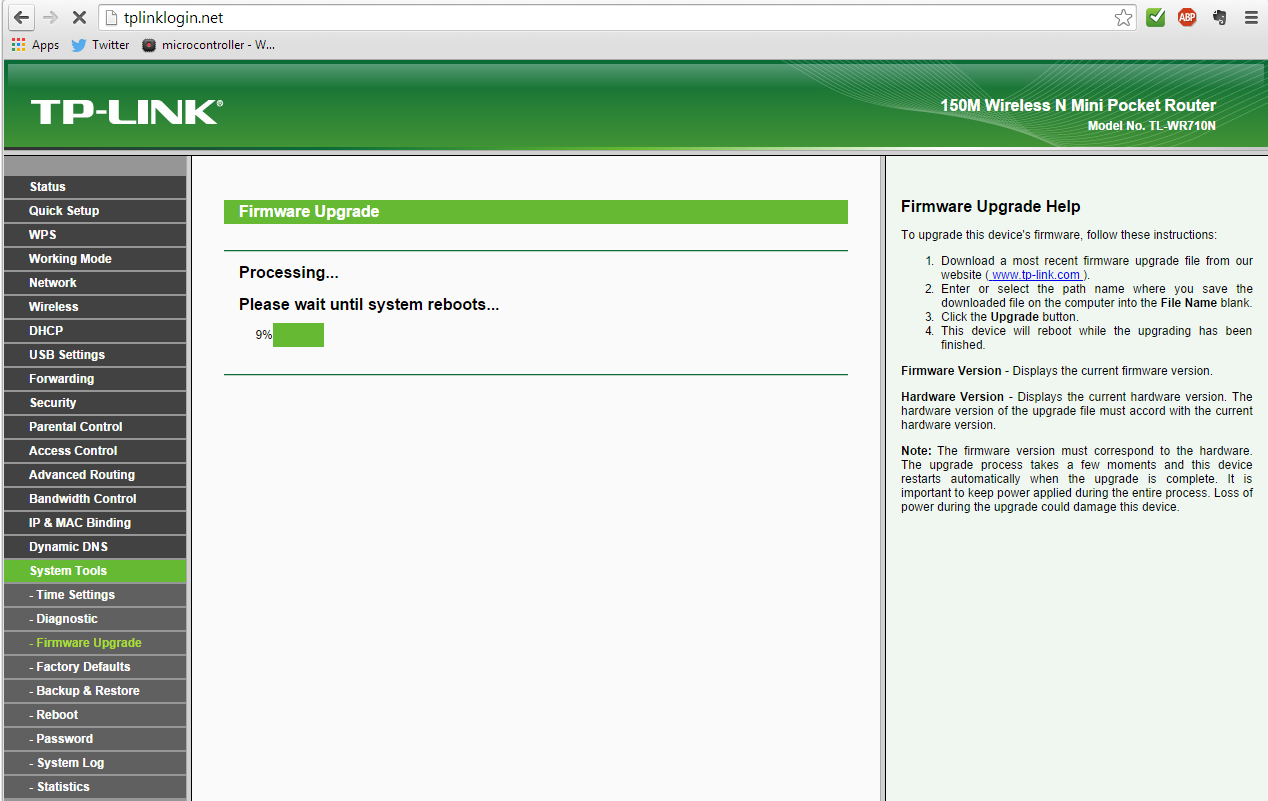
Firmware upgrading
Restarting system
Software upgraded successfully
Initial Configuration of OpenWRT
Your computer should have detected the device rebooting and reconnected to the network. Make sure you can still browse to the Internet. Once that’s working, you can start configuring.
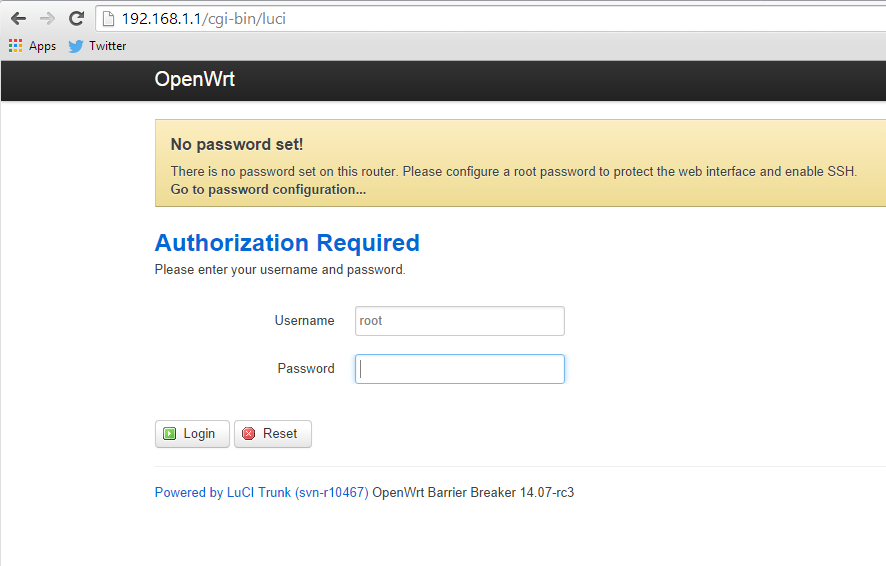
- Open a browser and navigate to http://192.168.1.1/
- Click the Login button. This logs you in with the default root user with no password
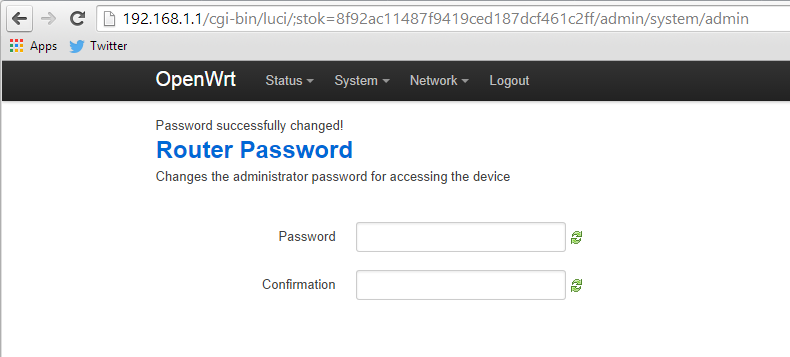
- Once the Status page loads, there is a message at the top saying “No password set!”. Click the Go to password configuration link below it
- On the Router Password page, set a secure and memorable password. Click the Save & Apply button at the bottom of the page
- On the same page in the SSH Access section, set the interface to LAN. Click the Save & Apply button
Log into openwrt

No password set
Set router password
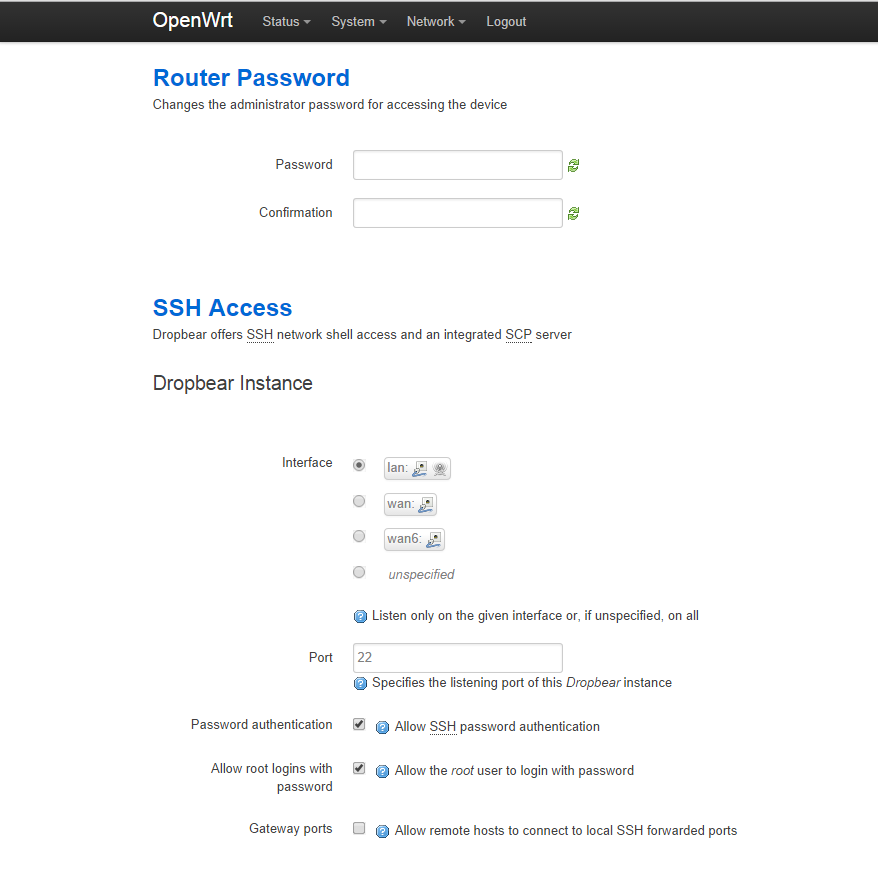
Set ssh to lan only
Make It Blink
There’s only one LED to show any kind of status. We’re going to make it do a slow blink by default. Then when the VPN is connected, it will automatically change to a fast blink so you know the VPN is up.
- From the web management menu, select System -> LED Configuration
- Click the Add button
| Option Name | Setting |
|---|---|
| Name | slowblink |
| LED Name | tp-link:blue:system |
| Default state | checked |
| Trigger | timer |
| On-State Delay | 500 |
| Off-State Delay | 5000 |
- Click the Save & Apply button
The LED should start blinking on and off roughly every 5 seconds.
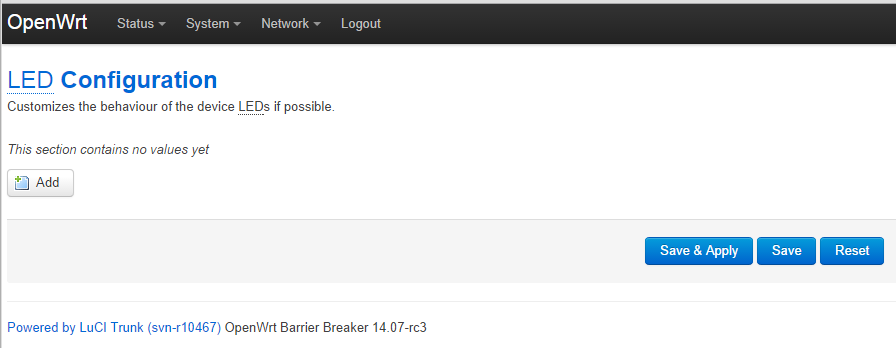
LED configuration screen
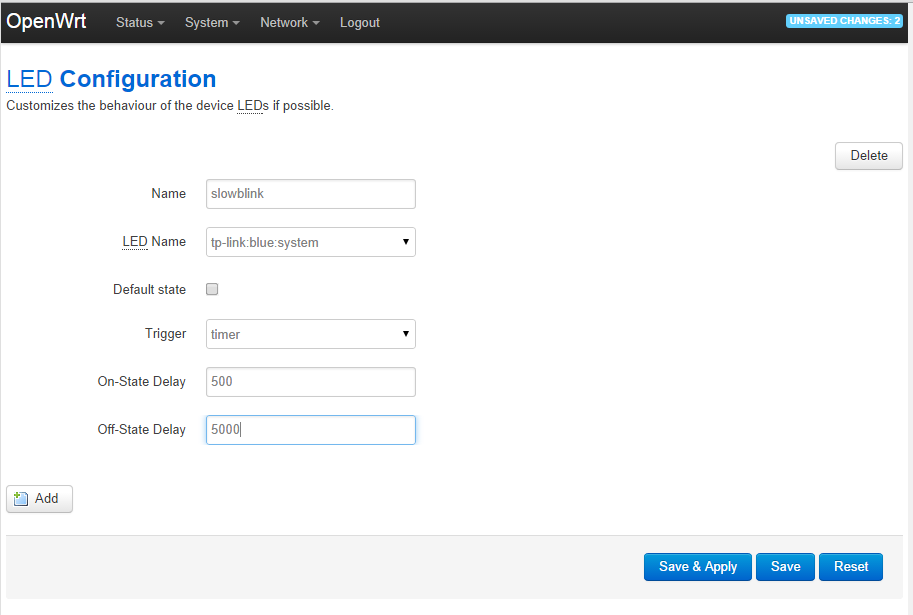
LED configuration settings
Untrusted Internet Wireless Network
Any existing wireless network can be used to complete this section. It’s better to not use an untrusted one yet.
- From the web management menu , select Network -> Wifi
- Beside Generic MAC80211 802.11bgn (radio0), click the Scan button
- Find the network you want to connect to and click the Join Network button
- UNCHECK the Replace wireless configuration box
- Enter a password if needed to connect
- Make sure the Name of the new network is wwan
- Make sure the Create / Assign firewall-zone is wan
- Click the Submit button
- In the next Wireless Network page, click the Save & Apply button

Network Wifi page

Join wireless screen
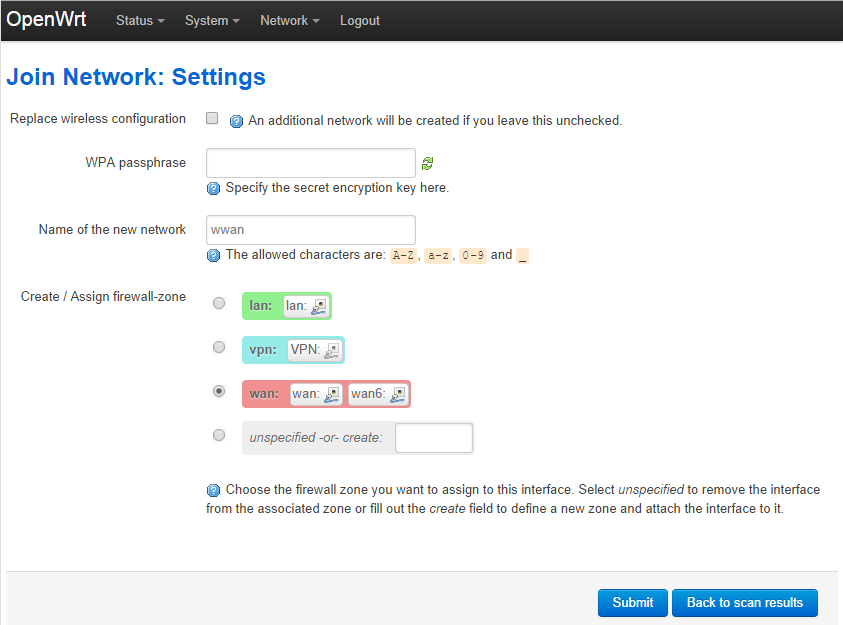
Join Network Settings
Wireless network settings
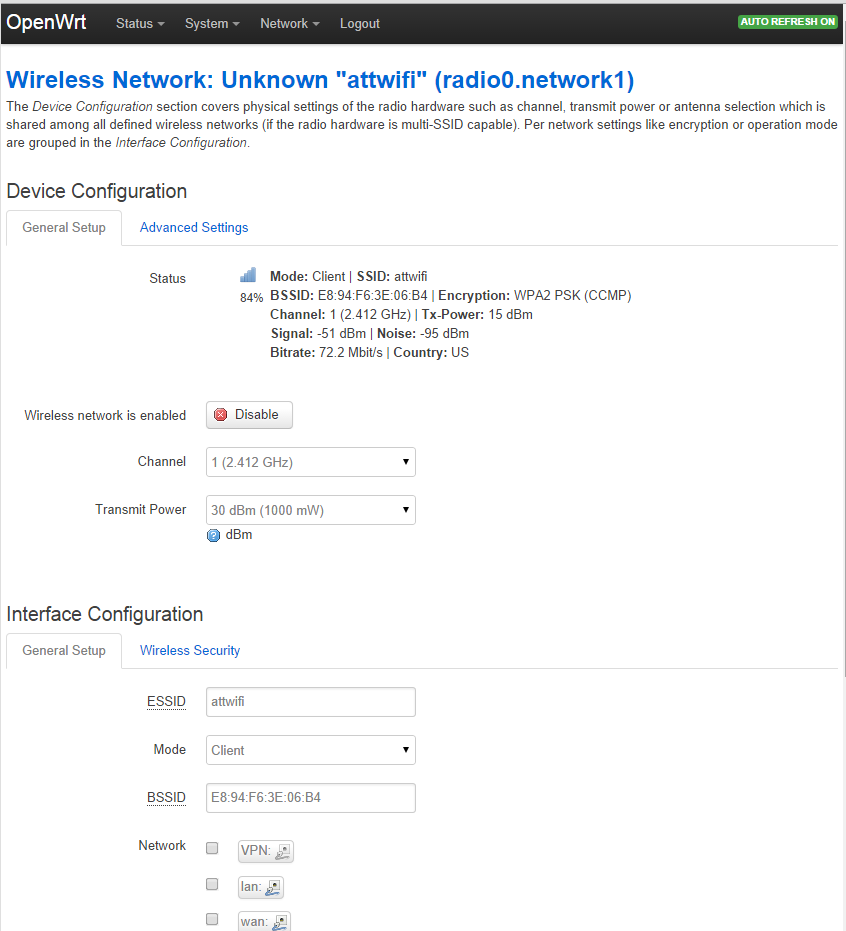
Internal Wireless Network
This is the secure wireless network that your devices can connect to. It should be encrypted with a good password.
- From the menu, select Network -> Wifi
- Click the Edit button beside the OpenWrt network
- Change the wireless name (ESSID)
The wireless network name should be memorable, but without a way to tie it back to you. One good place to generate nonsense words is http://www.soybomb.com/tricks/words/
- Make sure the mode is set to Access Point
- Make sure the network is set to LAN
- Click the Wireless Security tab
- Change Encryption to WPA2-PSK
- Change Cipher to Force CCMP (AES)
- Set the Key to the password you want to use
- Click the Save & Apply button
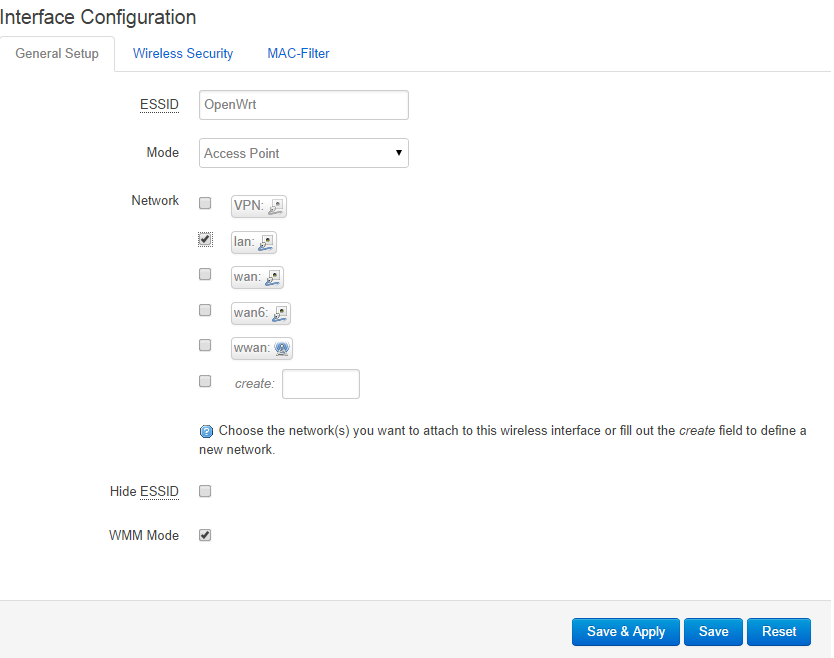
Wireless general setup
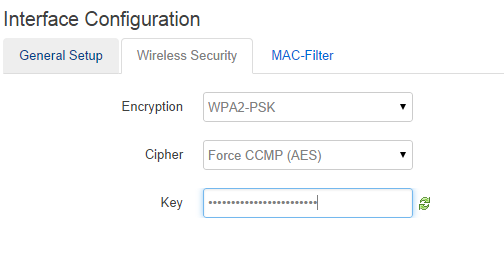
Wireless security setup
Disable the Untrusted Wireless Network
Until we do the initial test, disable the untrusted wireless network
- From the web management menu, select Network -> Wifi
- Find your untrusted wireless network and click the Disable
button beside it
Firewall Configuration
- From the web management menu , select Network -> Firewall
- In the General Settings section
- Change Input to drop
- Change Forward to drop
- In the Zones section for the wan zone
- Change Input to drop
- Change Forward to drop
- Click the Save & Apply button
- Select the Traffic Rules tab
- Uncheck the Enable checkbox beside these Traffic Rules
- Allow-DHCPv6
- Allow-ICMPv6-Input
- Allow-ICMPv6-Forward
- Click the Save & Apply button
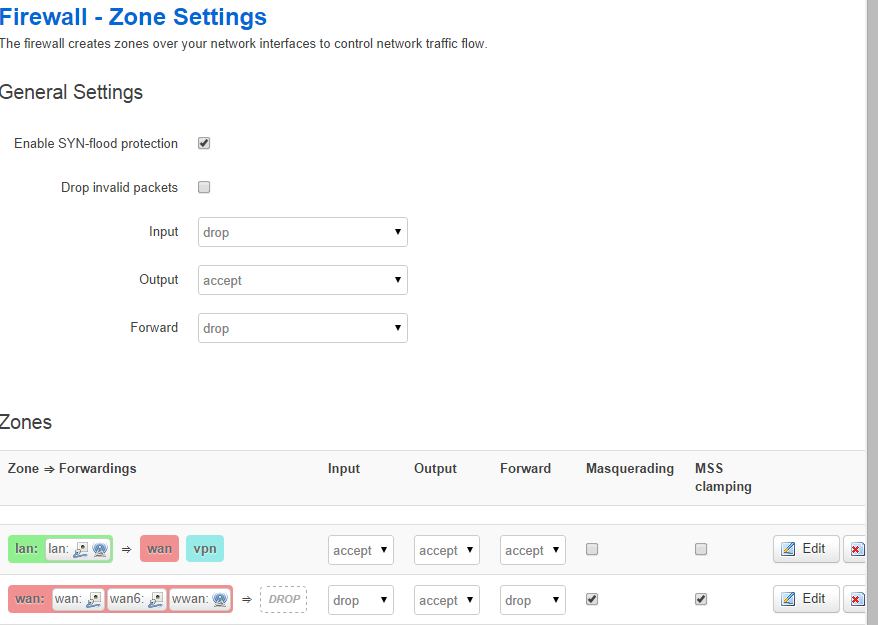
Firewall zone settings

Firewall traffic rules
End of Act I
At this point, the device makes a nice hardware firewall. All traffic is allowed out but no traffic is allowed in. It’s completely usable at this point.
Now for OpenVPN
Add the interface for the VPN
- From the web management menu, select Network -> Interfaces
- Click the Add new interface button
- Name of the new interface: VPN
- Protocol of the new interface: select Unmanaged
- In Cover the following interface, select Custom Interface and enter tun0 into the box beside it.
- Click the Submit button
- In the next “Interfaces - VPN” page
- Select the Firewall Settings tab
- Make sure unspecified or create is selected. Enter vpn in the box beside it
- Click the Save & Apply button
- From the web management menu, select Network -> Firewall
- Click the Edit button beside the vpn zone
- In the Firewall - Zone Settings - Zone “vpn” page
- Enable Masquerading
- Enable MSS clamping
- In the _Inter-Zone Forwardin_g section
- Allow forward to destination zones: select wan
- Allow forward from source zones: select lan
- Click the Save & Apply button
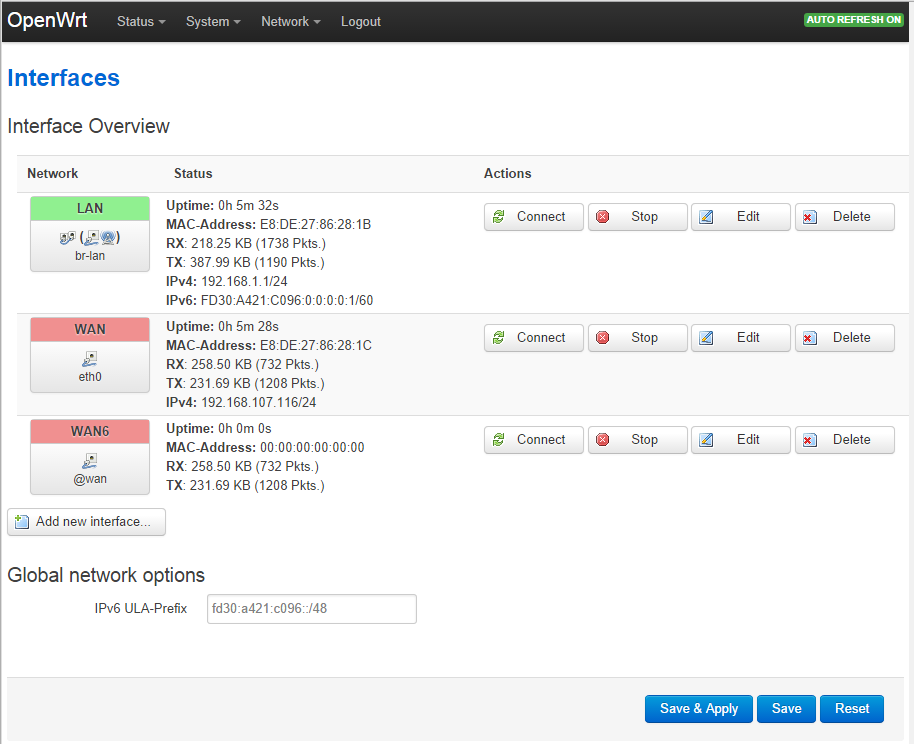
Interfaces screen
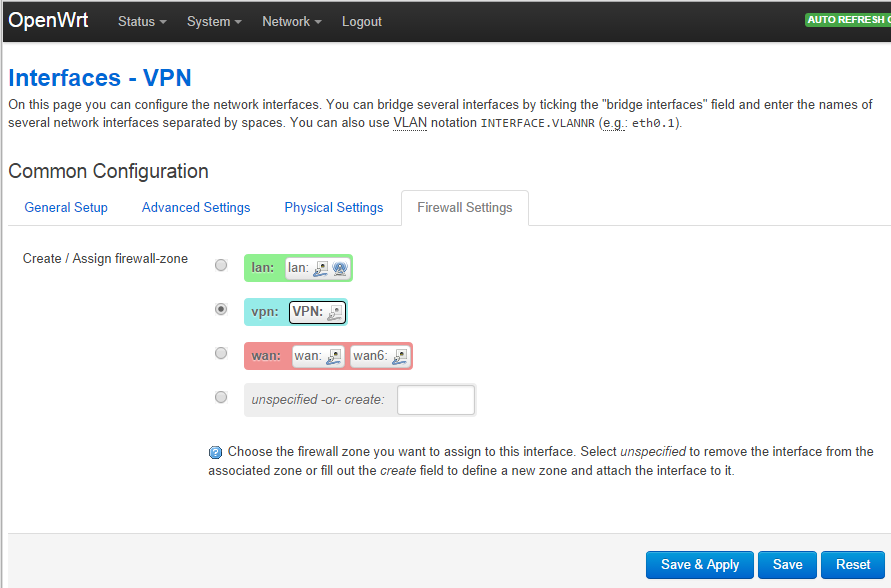
Interface for vpn
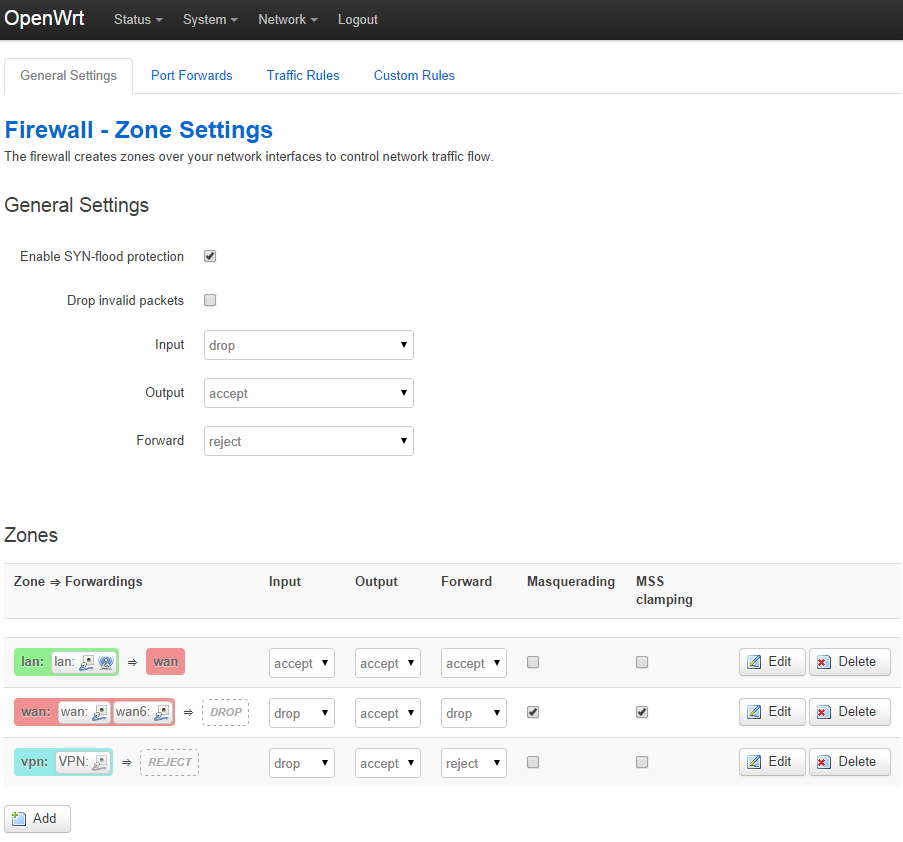
Firewall zone settings
Installing OpenVPN
- From the menu, select System -> Software
- Click the Update lists button to refresh the list of available packages
- In Download and install package enter openvpn-openssl and click OK
This may take a couple of minutes and could possibly give an error as it’s refreshing status. You may have to select System -> Software a couple more times until openvpn-openssl appears in the list of Installed packages
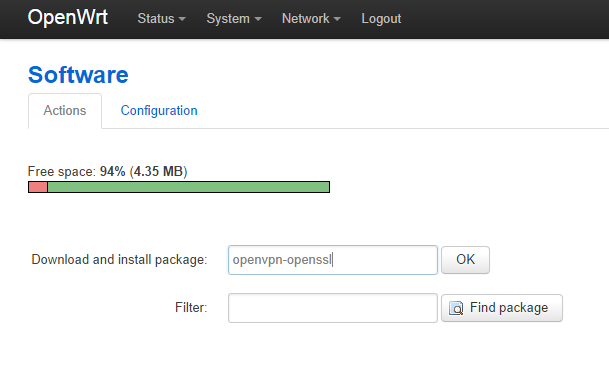
Installing openvpn package
Getting VPN Provider Configuration Files
This is where things may change, depending on your OpenVPN provider. Mine has a zip file with all of the configuration files needed to connect. Out of those, the certificate files ca.crt, client.crt, client.key and ta.key will need to be copied to the device in a moment.
Also in the file is a vpn.conf file with configuration options. In that file is the server name and port needed to configure the device.
Download the configuration file(s) from your VPN file and see if they contain the same files.
Getting My OpenVPN Configuration Files
To reduce some of the command line configuration, I’ve made a set of configuration files to get through this last bit. Download the file.
- Extract openvpn_files_for_openwrt.zip
- Edit the openvpn_files_for_openwrt\etc\openvpn\myvpn.pass file
- Put your vpn username on the first line
- Put your vpn password on the second line
- Save the file
- Edit the openvpn_files_for_openwrt\etc\config\openvpn file. You may have to select Notepad if you double-click, or open Notepad and then open the file.
- On the last line with option remote ‘my.openvpn.server 1194’,
replace my.openvpn.server with the server name or IP of your
VPN server. Replace 1194 with your vpn port - Save the file
- On the last line with option remote ‘my.openvpn.server 1194’,
- Look through the rest of the files. They should be short and simple enough that they make sense and you can make sure they don’t have any hidden backdoors.
Copying Files to the Device
Next is copying the configuration files to the device. For people not familiar with Linux systems, SSH and SCP are ways to log in and copy files. Windows doesn’t have this by default, but Putty and WinSCP are great tools to use on Windows systems. We’re going to use WinSCP to copy the files over.
Also as a note, Windows displays folder paths as etc\config\openvpn. Linux displays them as etc/config/openvpn. We won’t restart the war over which one is better.
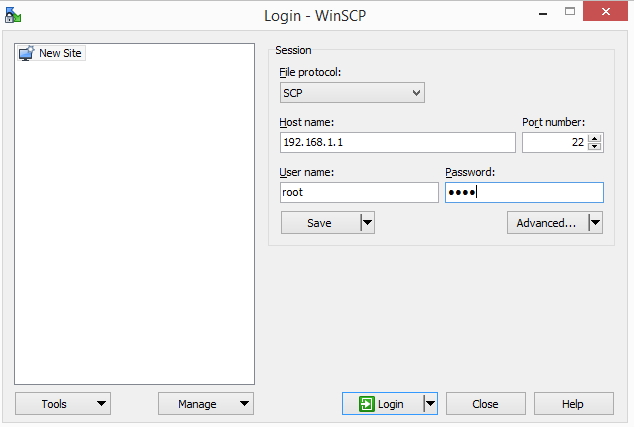
- Open WinSCP. It should bring up a login screen
- Change the File protocol to SCP
- In Host name, enter 192.168.1.1
- In Username, enter root
- In Password, enter the password you set
- Click the Login button
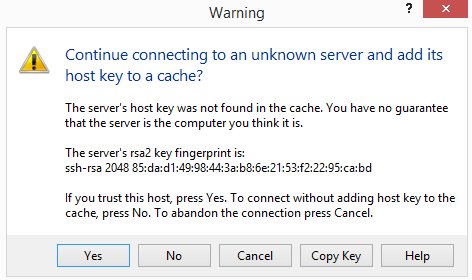
- The first time you connect to a system, it will give an unknown server warning. Click the Yes button
On the left half of the screen is your computer. On the right is the device. Each side shows the current folder for that system. You can drag and drop files from one to the other to copy them back and forth. In the toolbar on each side are buttons to navigate directories, go up one folder, etc. The Up button (with the hint Parent Directory) is the most useful here.
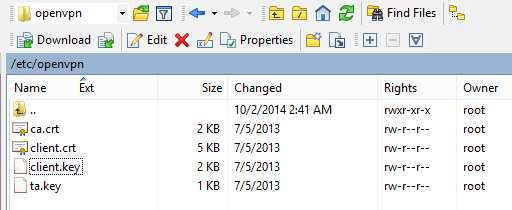
- On the right side navigate to /etc/openvpn
- Use the dropdown or the up button to go up to the / (root) directory
- Double-click the etc folder
- Double-click the openvpn folder
- On the left side, navigate to where you have your VPN Provider configuration files
- Drag the ca.crt, client.crt, client.key and ta.key files to the right side to copy them
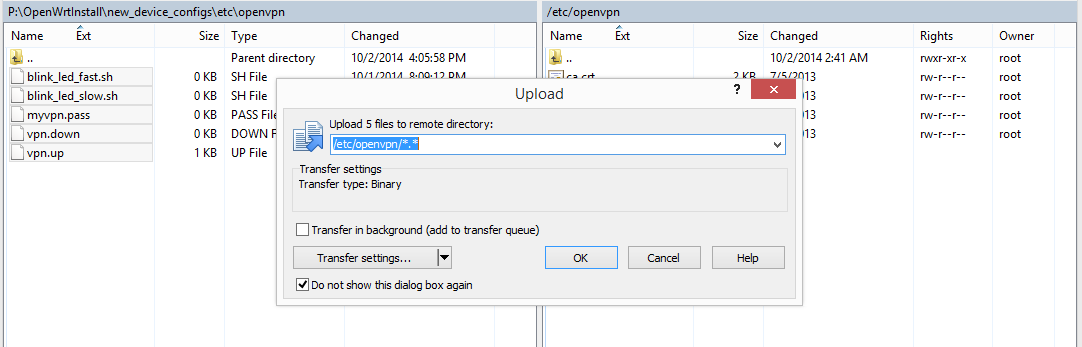
- In the Upload dialog box, click OK
- Copy your OpenVPN configuration files
- On the left side, navigate to where you have your OpenVPN configuration files
- On the left side, go into the etc\openvpn folder
- Copy the blink_led_fast.sh, blink_led_slow.sh, myvpn.pass, vpn.down and vpn.up files to the right side (in /etc/openvpn)
- Change Permissions
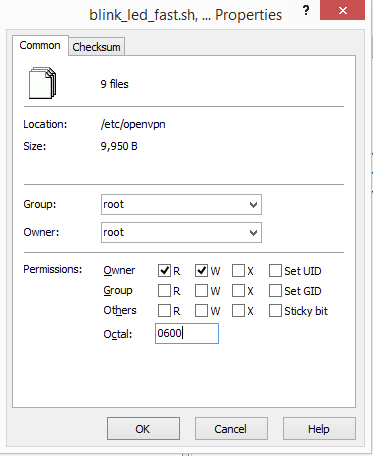
- On the right side, select all the files and click the Properties button
- In Octal, enter 0600. The permissions checkboxes should automatically change
- Click OK.
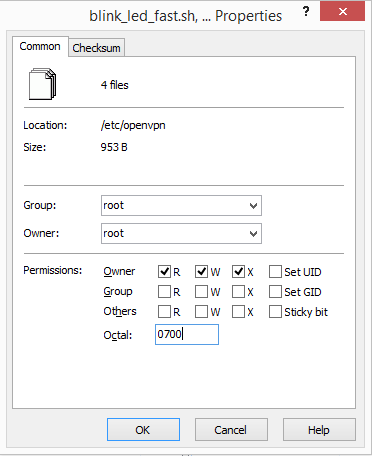
- On the right side, select the blink_led_fast.sh, blink_led_slow.sh, vpn.down and vpn.up files and click the Properties button
- In Octal, enter 0700.
- Click OK
- On both the left and right sides, navigate up one level (to etc) and open the config folder
- Copy the openvpn file to the right side (in /etc/config)
- On the Overwrite File dialog screen, click the Yes button
- On both the left and right sides, navigate up one level (to etc) and open the rc.button folder
- Copy the reset file to the right side (in /etc/rc.button)
- On the Overwrite File dialog screen, click the Yes button
- Close WinSCP
WinSCP site
Accept server key
Navigate to files
Drag files to upload
Old permissions
New permissions
Reset the device
- From the web management menu, select System -> Reboot
- Click the Perform reboot link
- The device LED will blink while it’s loading, then go into a very slow blink cycle (once every 5 seconds)

Reboot device
Push the Button
Now we get to test and see if it all works. The page that shows how to use the device is here, but we’ll go through the basics and make sure it works.
- Find a paperclip
- Find the Reset button. It’s between the LAN/WAN port and the USB port
- Push the Reset button (for less than a second). You should hear/feel it click.
- After a couple of seconds, the LED should start a fast blink cycle
- To test, open an web browser and go to a geolocation website like http://www.iplocation.net/ . It should show a location different than yours.
That’s it. You’re done.
Troubleshooting
Hate to say it, but sometimes things go wrong. Here’s some general steps to start troubleshooting any issues.
- If nothing happens when you press the button, check all of the
configuration files uploaded to the device and the permissions in
/etc/openvpn. These are the files that start the vpn when you press
the button and control the LED - For everything else, compare the web interface to the instructions
and make sure you didn’t miss a step. - It’s also entirely possible that I missed a step. Post a comment
here and I’ll take a look and comment/update as needed.
Hardcore Troubleshooting on the Command Line
When all else fails, time to break out some command line foo. For Windows system, this requires a SSH tool like Putty to be installed.
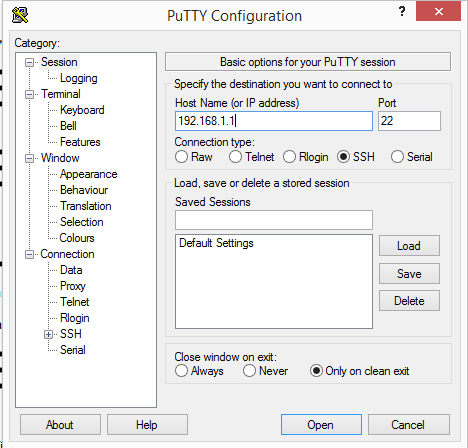
- Run Putty. The PuTTY Configuration dialog should appear
- In Host Name, enter 192.168.1.1
- Click the Open button. The main window should open
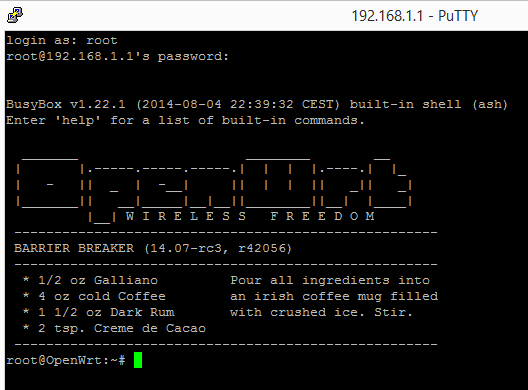
- For login as: enter root
- For password:, enter the password you set
- Type in the command
- /etc/init.d/openvpn start
- See if the LEDs start the fast blink. If not, enter this command to stop the vpn
- /etc/init.d/openvpn stop
- Enter this command below to start watching the VPN log
- tail -f /tmp/openvpn.log
- Now press the Reset button to start the VPN. If nothing happens,
the /etc/rc.button/reset configuration may not be correct. If text
starts scrolling by, look for cannot connect to server or invalid
username/password type messages which may indicate that the VPN
provider configuration files or the /etc/openvpn/myvpn.pass file
may not be correct. You can fix these on your systems and use WinSCP
to re-upload the files
Putty configuration
Openwrt command line